
The Registration area turns your event site into a full sign-up and checkout experience: attendees pick who they are, choose their items and sessions, answer your questions, and pay by card. Everything lives under Registration in the left menu.
The Pages
- Activation switches registration between Test and Live, sets its dates and a rehearsal password, and chooses built-in registration or an outside one.
- Registrant Types: who registers, what it costs them, and any gate such as a code, a member list or your speaker list.
- Hotel Room Blocks: rooms attendees book while they register.
- Form Builder: what each type sees, step by step: items, questions, disclaimers, deals and rules.
- Form Designer: how the form looks.
- Credit Card Processing: connecting your payment account.
- Beside them: Email Templates, Attendee Invitations and Attendee Messaging; Badges; and the Item Library, Field Library and Member Lists, which your whole account shares.
How the form flows for attendees
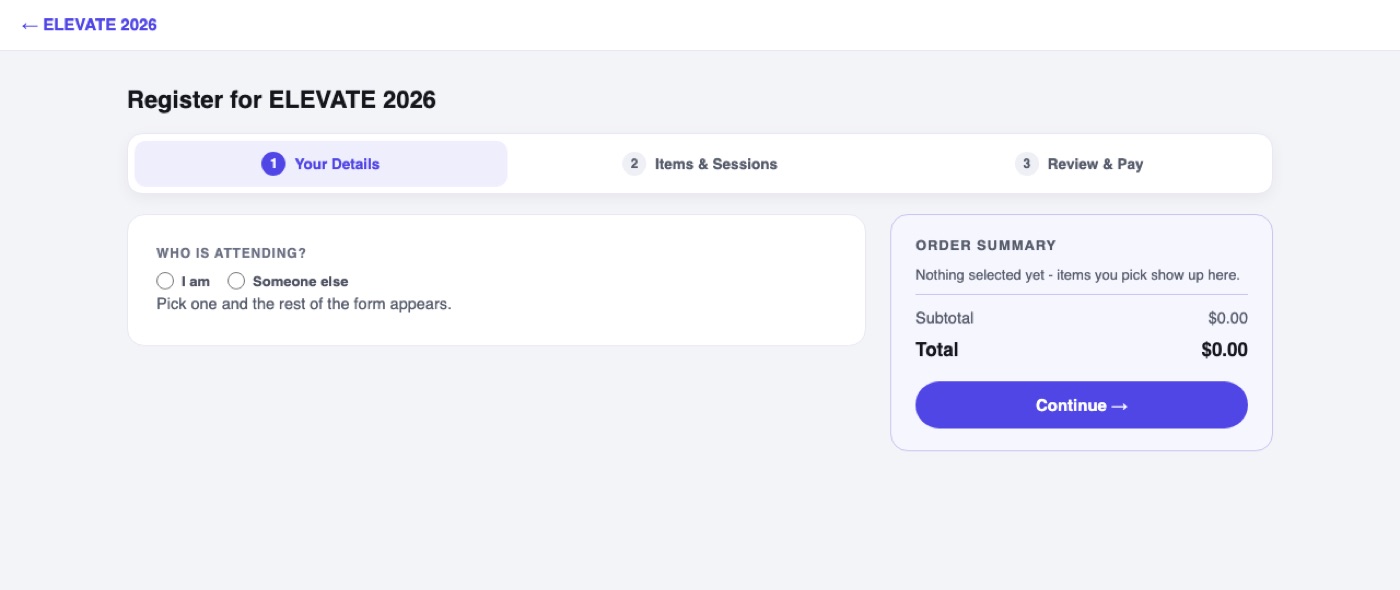
- The form opens with one question: Who is attending? The rest of the form appears once they answer, so nobody fills in details for the wrong person.
- They pick a registrant type (if you offer more than one), then choose items and sessions. A running order summary follows them the whole way.
- They answer your form questions, review the total, and pay. Free registrations skip the card step entirely.
When someone registers on another person's behalf
If your form allows it and the visitor answers Someone else, the form asks for two people. Your Details is the person filling in the form, who stays the contact for the registration, and Attendee Details underneath is the person actually coming. Each block is shaded differently so nobody fills in the wrong one.
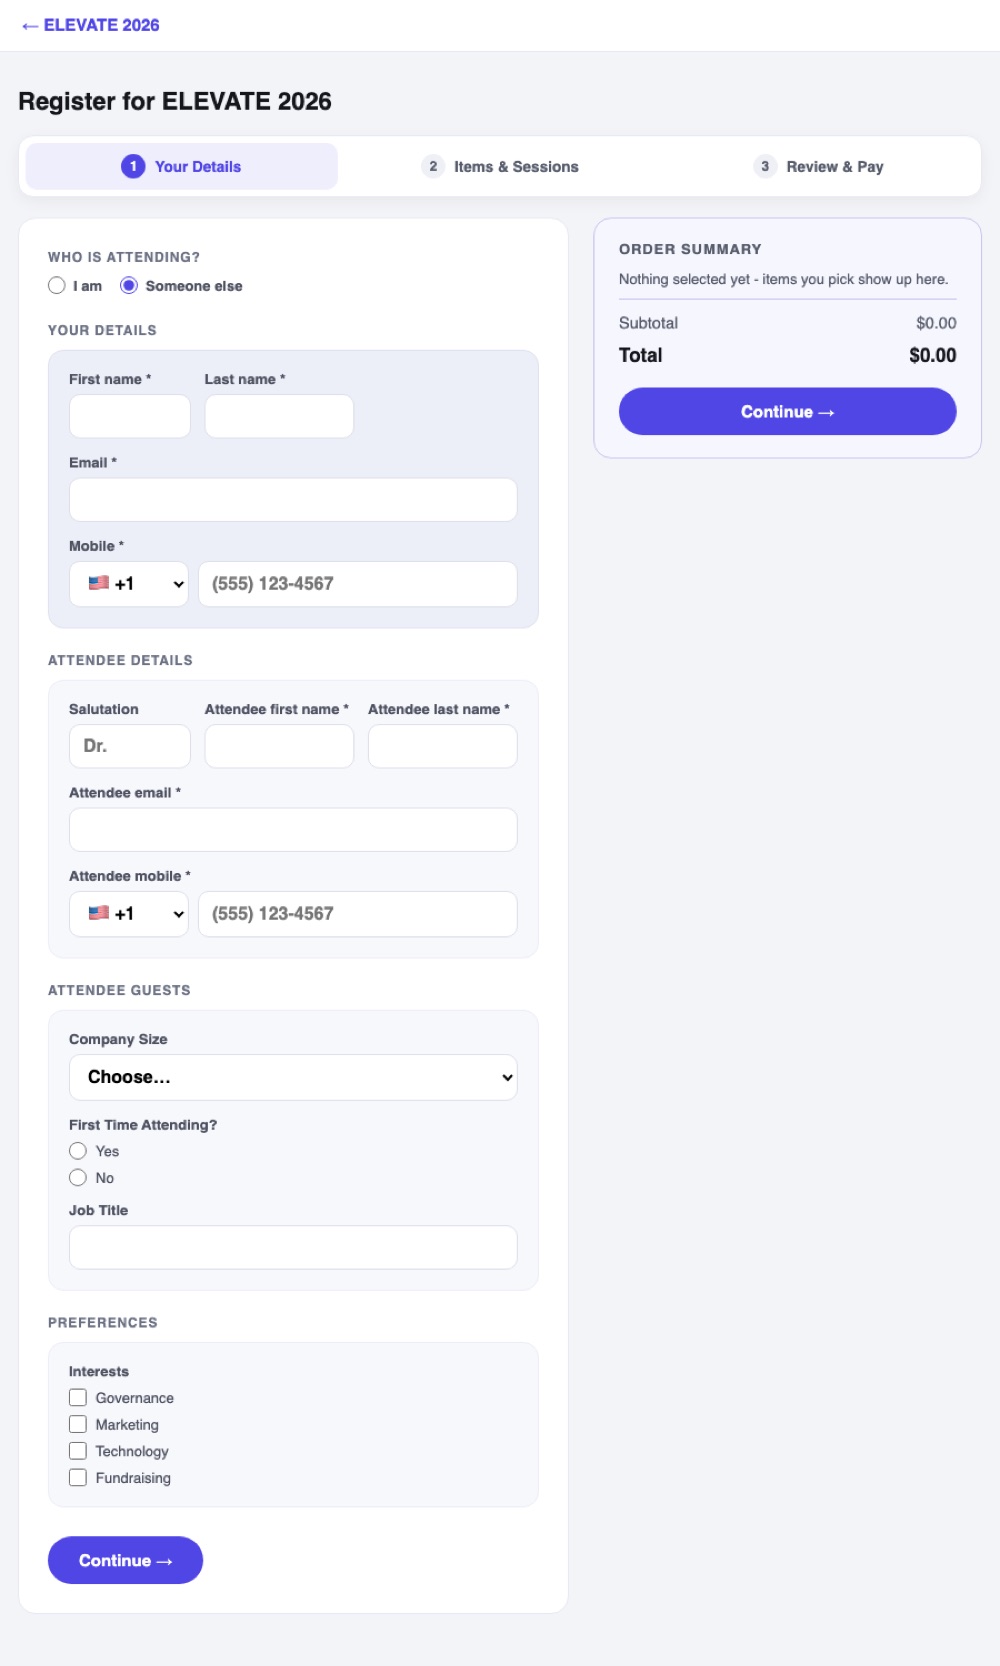
The attendee has a Salutation box that suggests the common titles as you type, from Mr. and Dr. through Hon., Maj., and Justice, and accepts anything else you type instead.