
If you hold a membership file and want a registrant type only members may choose, import the roster once under Member Lists and point the type at it. The member proves membership before the form appears, so you never chase anyone for proof and you never hand a member rate to somebody who is not on the list.
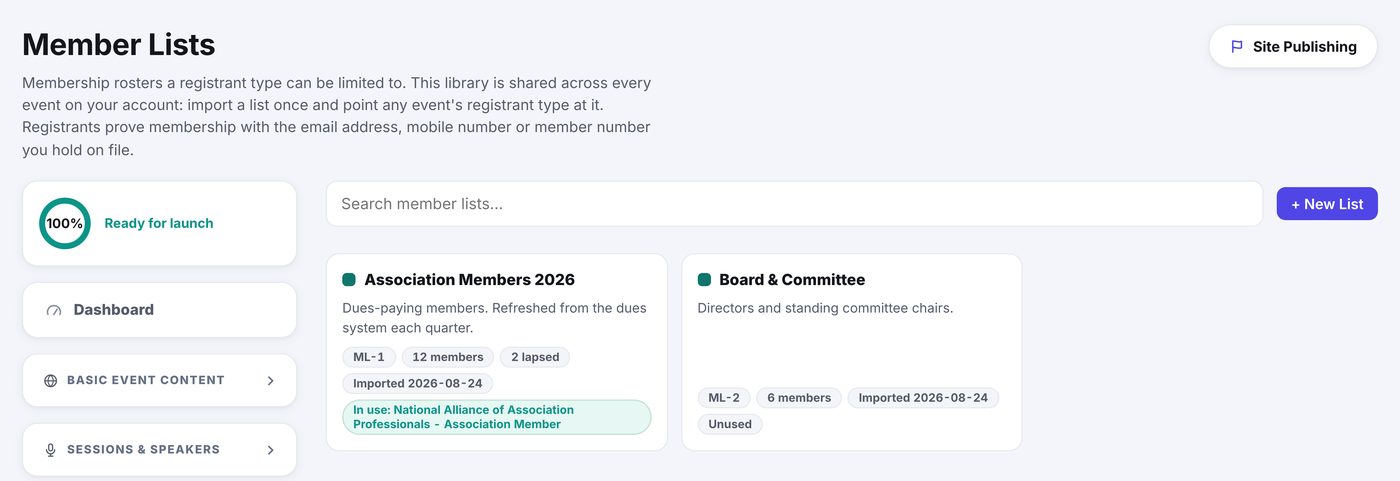
The library is shared across your events
Member Lists sits with the Item Library and the Field Library under Cross-Event Libraries, and like them it belongs to your account, not to one event. Import a roster once and every event you build can use it. Deleting an event never deletes the roster.
Building a list
- Open Registration, then Member Lists.
- Click + New List, name it, and add a note so you remember where it came from.
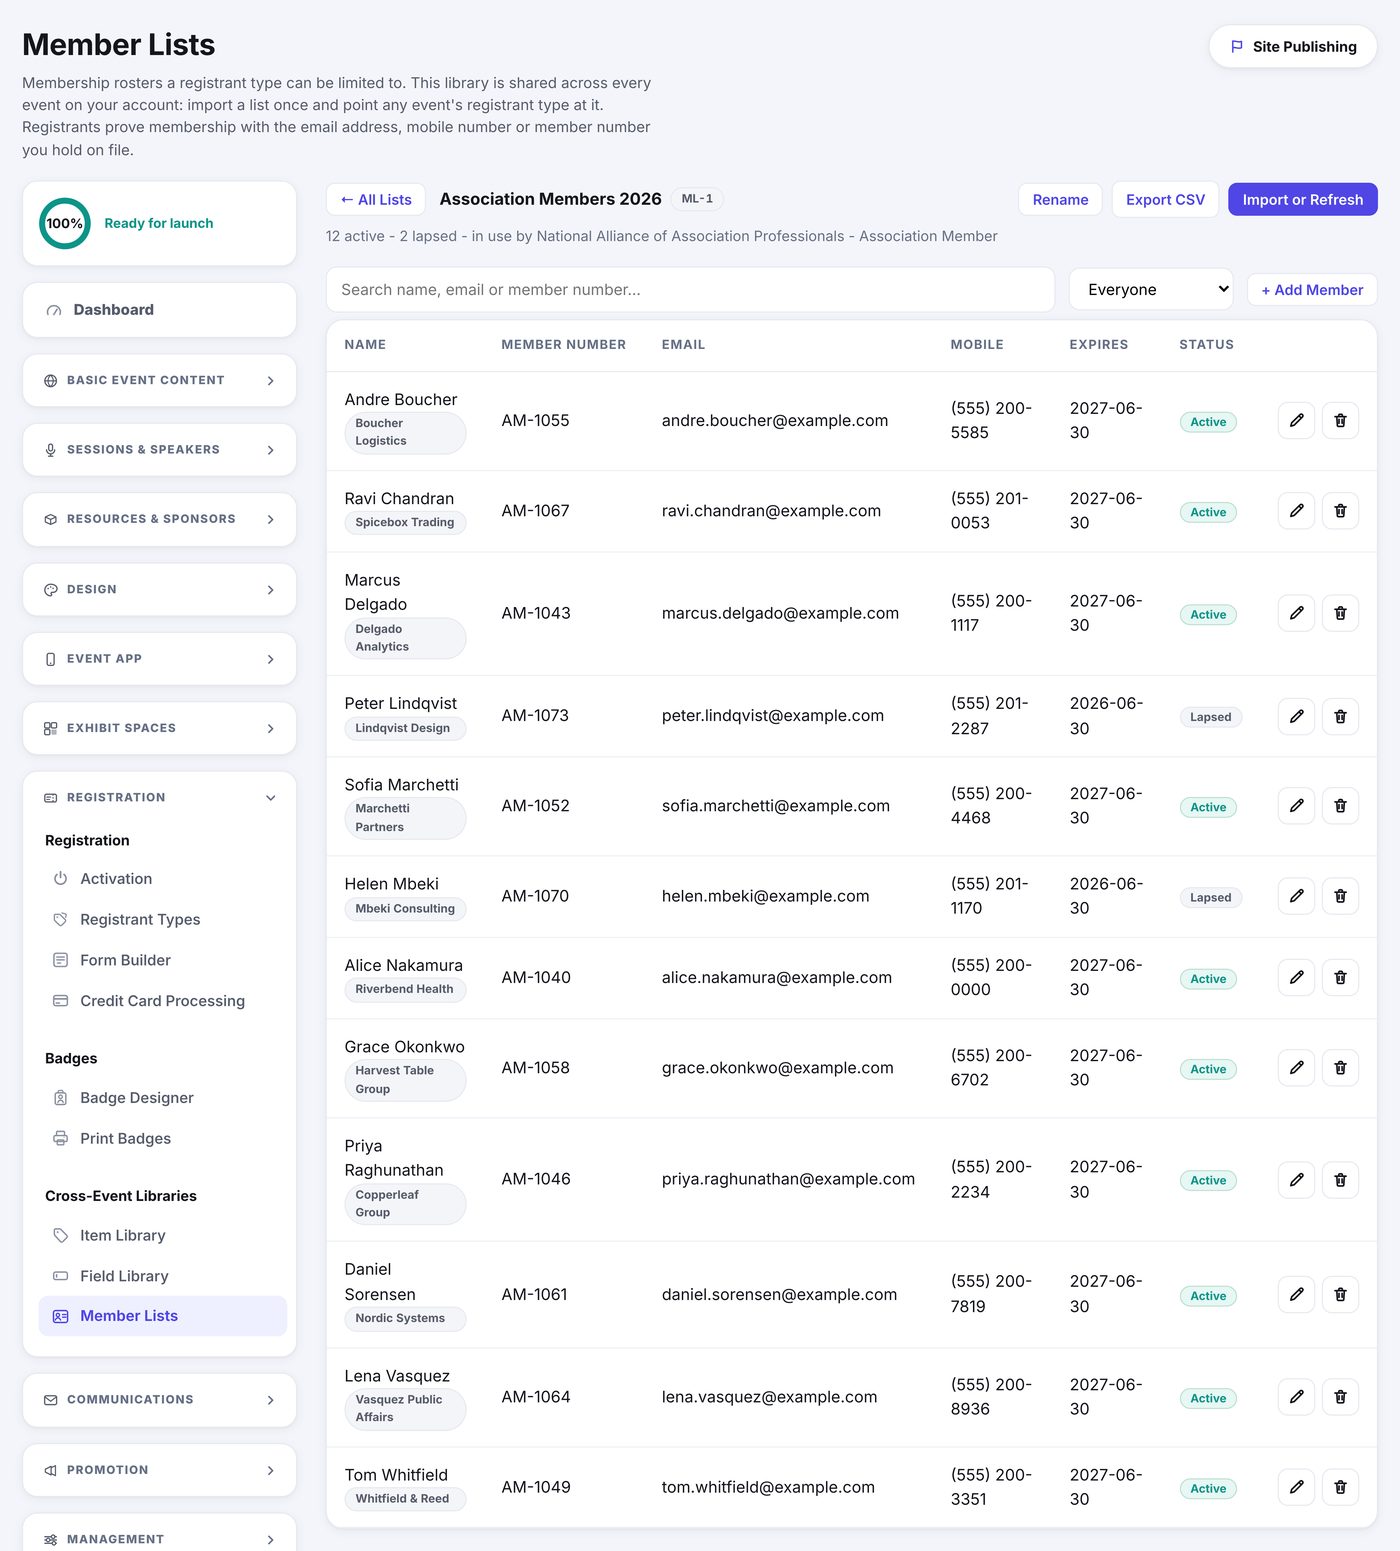
- Click Import or Refresh and choose your CSV. We read the column headers and show you what we think each one is; correct anything we got wrong.
- Import. The roster fills in, and you can search, edit a row, or add one person by hand at any time.
Attaching a roster to a registrant type
- Open Registrant Types and edit the type.
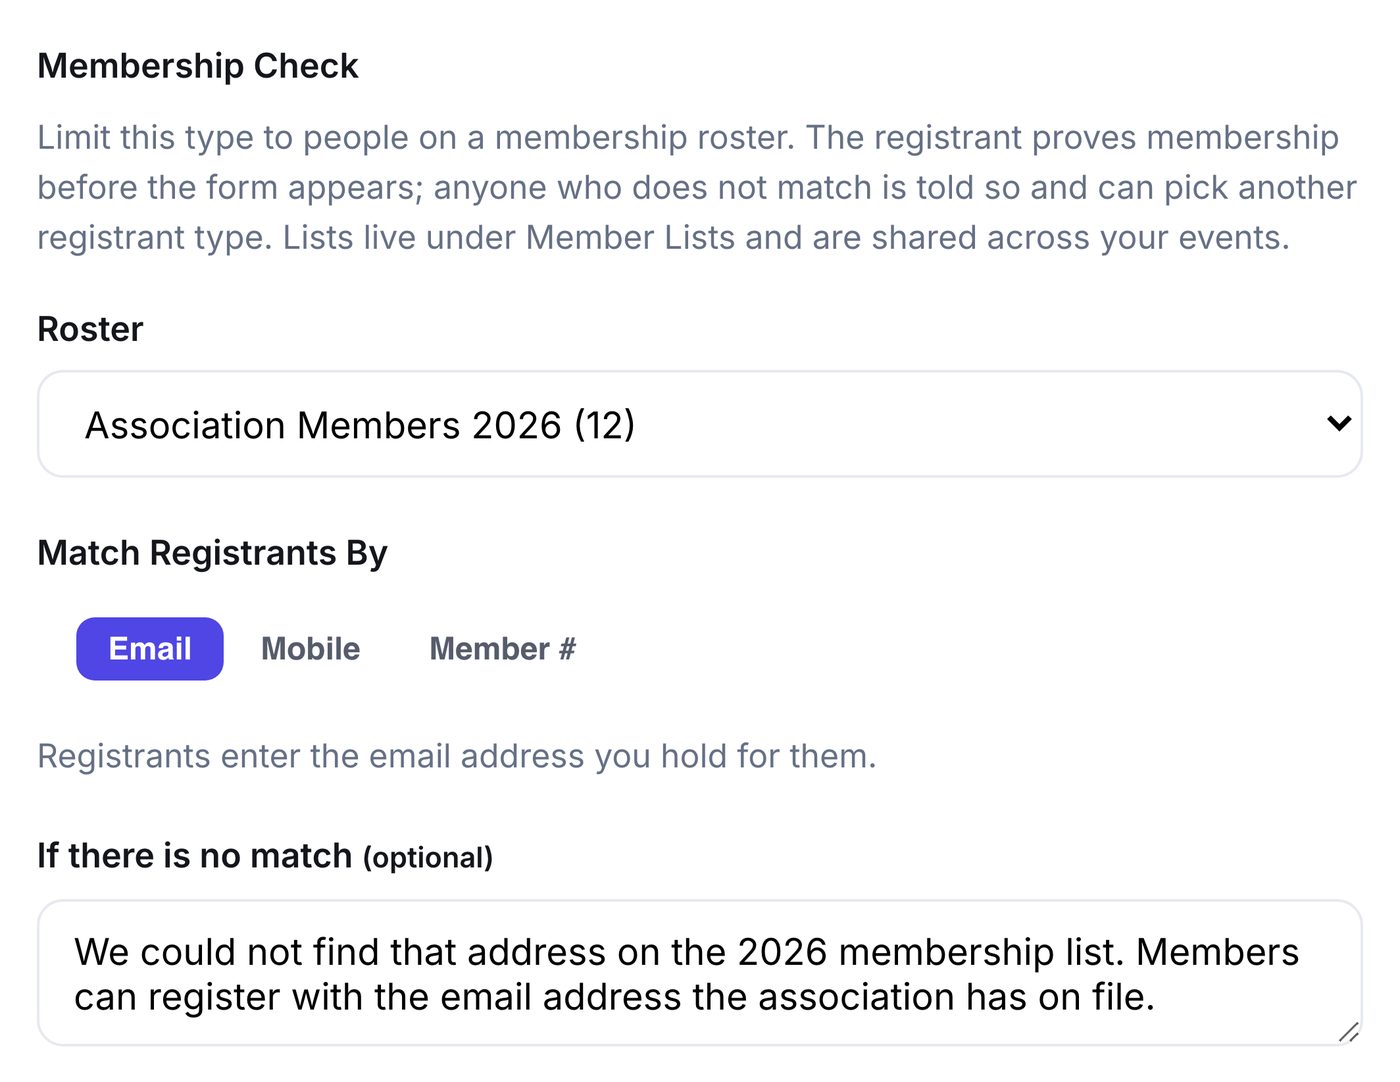
- Under Membership Check, pick the roster. Picking one is the switch: there is no separate box to tick.
- Choose what the member enters to prove membership: their email address, their mobile number, or their member number.
- Write the line they see if nothing matches. Yours replaces ours, so use it to say what to do next.
- Save.
What the member sees
- They enter the one value you chose. A mobile number matches however it is written: brackets, dashes, a leading 1, or none of it.
- Member number always asks for the last name too. Membership numbers usually run in sequence, so one on its own would let anyone walk the list.
- A lapsed or expired membership is told exactly that, not just "not found", so a member who renewed last week knows to call the association rather than your event.
- One registration per member, per event. Their membership still works for your other events.