
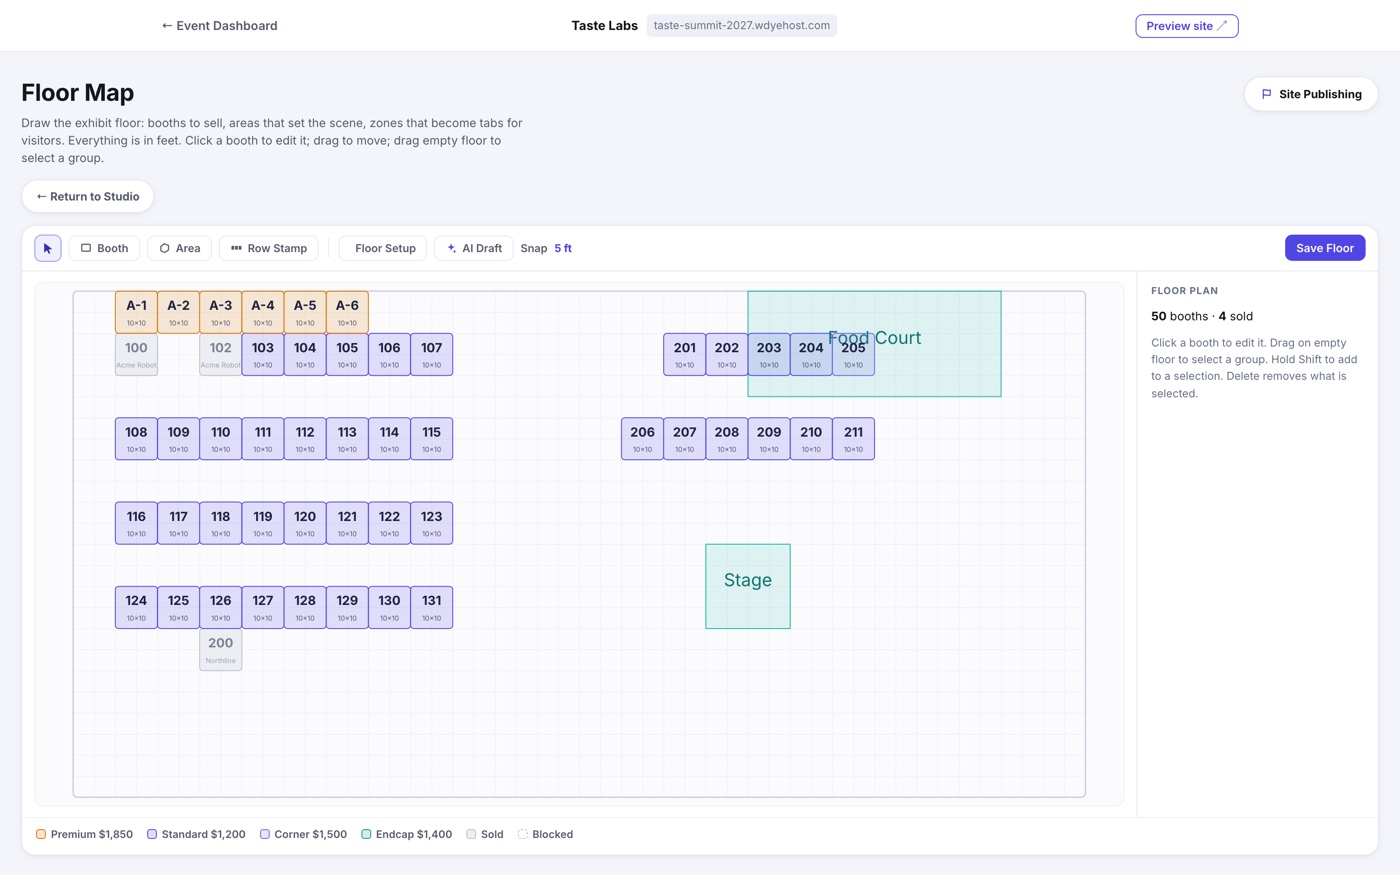
A floor map is a scale drawing of one hall. Everything is measured in feet, so a 10 x 10 booth is really 10 x 10, and the map your buyers see matches the room they will stand in. Add as many maps as you have halls.
The tools
- Select (the arrow) clicks a booth to edit it, or drags across empty floor to select a group. Hold Shift to add to a selection.
- Booth Grid lays down a whole block of numbered booths in one drag, using the category's default size and price.
- Row Stamp does the same for a single row.
- Booth draws one more where you need it. Click it afterward to set its number, size, price and category.
- Shape draws the parts of the room that are not for sale: the stage, food court, restrooms, aisles.
- Text labels them.
- Floor Setup holds the hall dimensions, the snap grid, zones, and an optional background image of your venue's real floor plan to trace over.
- Categories brings the category list back to the right side, whatever you were doing: after clicking a booth, while another tool is active, or from Floor Setup. It stays highlighted while the list is showing.
- Registrant View opens the real registration form on a test link, already at this floor, so you see exactly what a registrant sees and which booths they can pick. Nothing you do there counts, holds a booth or charges anyone. Save the floor first: it shows what is saved. The same button sits on each map's row in Floor Maps. If no item opens the map yet, it tells you so, because nobody registering could reach it.
- AI Draft builds the first version of the map for you. Describe the layout in a sentence or two and the draft appears on the canvas ready to adjust.
Numbering and renumbering
Booth numbers are yours to shape. A selection can be renumbered in one pass: give it a starting number and the row counts up from there, add a letter prefix like A-10, A-11 for premium rows, or shift a whole block at once, say 2 through 18 becoming 200 through 218.
Zones
On a big floor, zones split the map into named tabs, like Hall A and Hall B, so a phone screen shows one manageable piece at a time. Buyers see the same zone tabs during registration.