
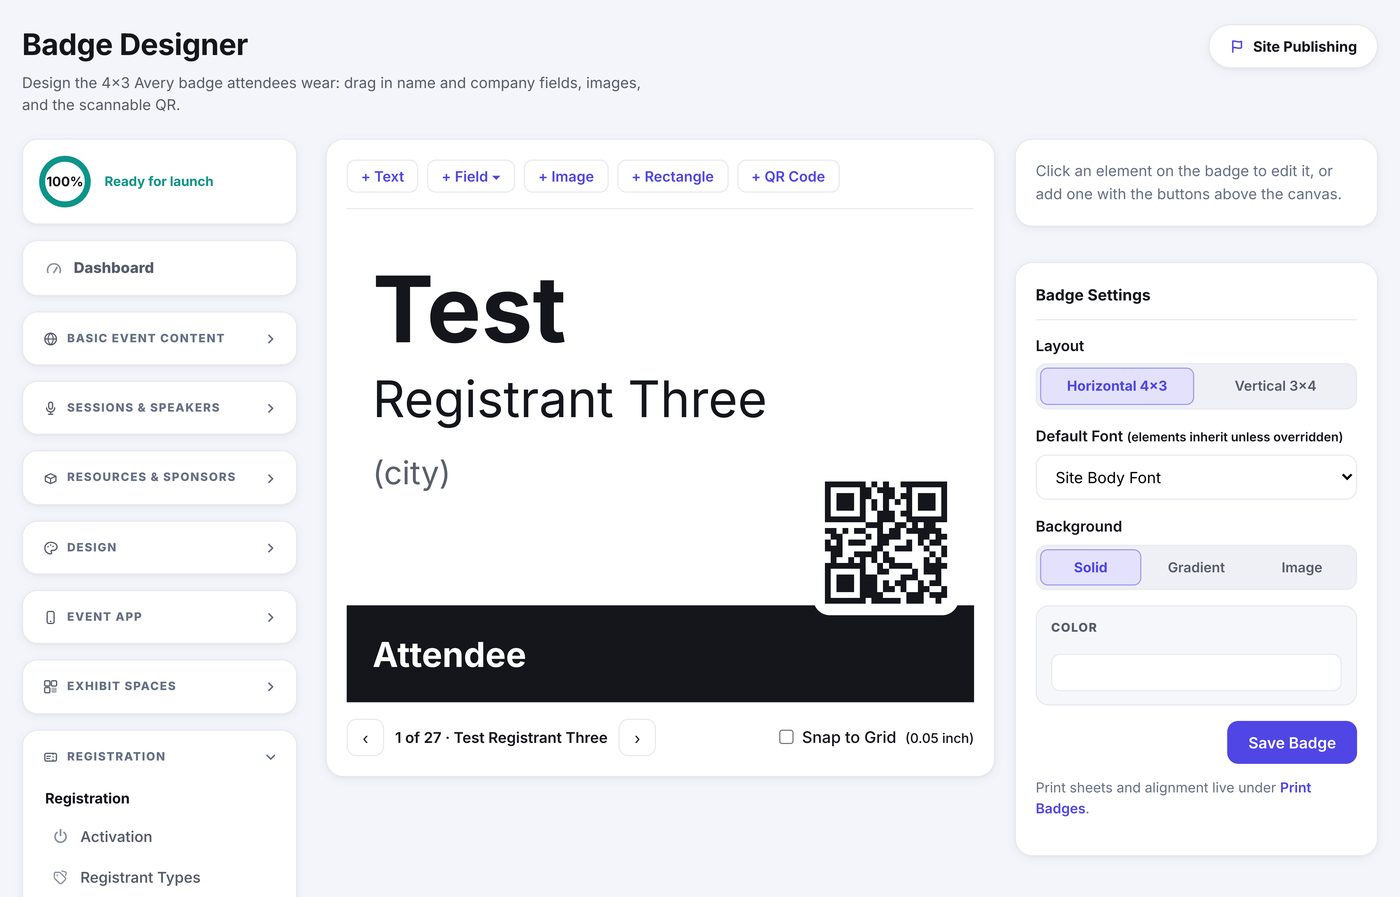
Badge Designer is a canvas the size of a real badge. Drag things where you want them, and every element you place reads from the actual registration, so you are looking at a real attendee's badge while you design it.
What you can put on it
- Field pulls from the registration: first name, last name, company, city, registrant type, or any question your form asks.
- Text is a fixed line, the same on every badge: the event name, a year, a tagline.
- Image is a logo or a sponsor mark.
- Rectangle is a band or a block of color, useful for a colored strip that names the type.
- QR Code is the attendee's own code. It is what the check-in app scans at the door and what other attendees scan to save the contact.
Laying it out
- Open Registration, then Badge Designer.
- Pick Horizontal 4x3 or Vertical 3x4 to match your holders.
- Click an element to select it, then drag it to move. Drag the handle on its edge to set the width, and the corner handle to set the height on images and rectangles.
- Use the rail to set the font, size, weight, alignment and color of whatever is selected.
- Set the background: a solid color, a gradient, or an image.
- Click Save Badge.
- Snap to Grid rounds every move to a twentieth of an inch, which is the fastest way to get things lined up.
- The arrows under the canvas step through your real registrants, so you can check a long name and a short one before you print.
- The default font follows your site's body font unless you override it on an element.